

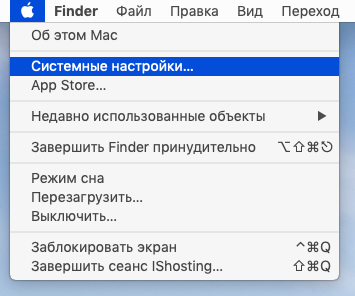
Open System Settings:
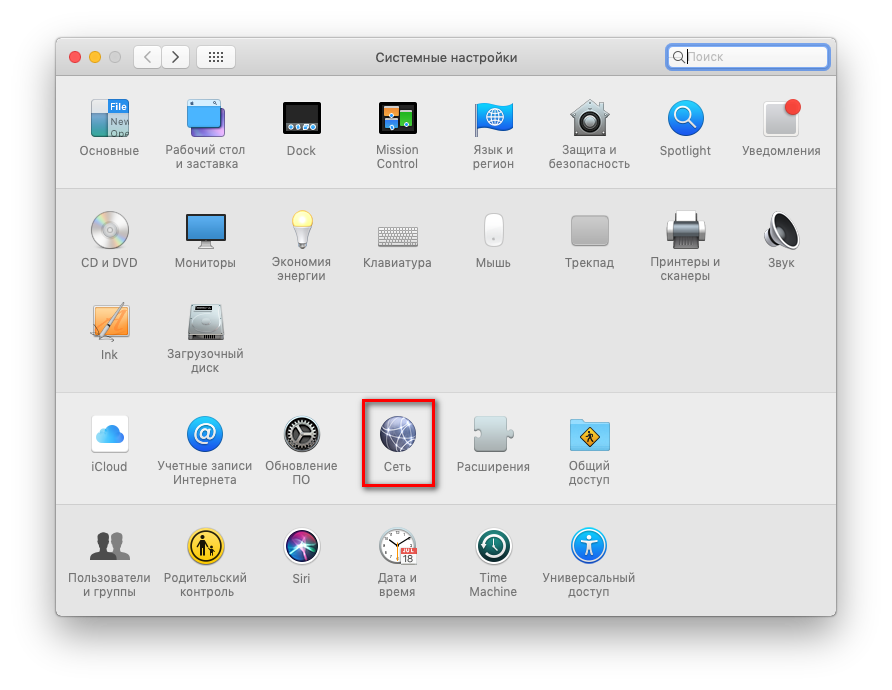
Go to the "Network" section:
Add a new VPN connection by clicking "+":

In the window that opens, fill in all the fields: "Interface" - VPN, "VPN Type" - L2TP over IPSec, "Service Name" - Hostetski :) (or any other name of your choice), then click "Create":

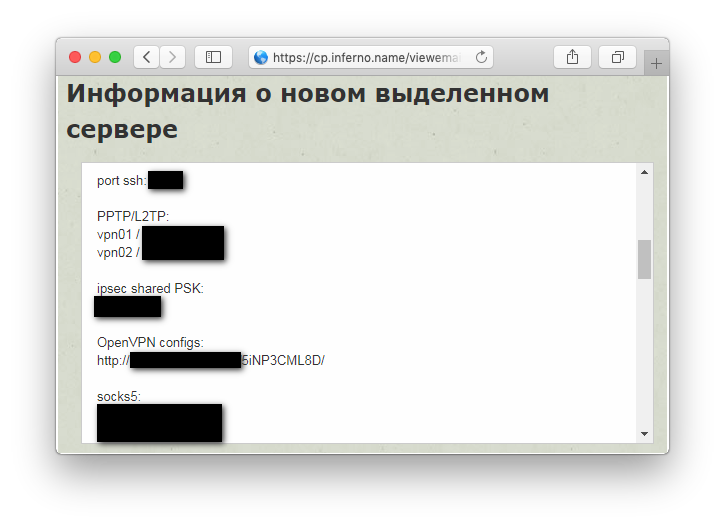
Next, fill in the fields "Server address" - the IP address of the VPN server, "Account name" - the PPTP/L2TP username from the message that you received by email after activating the service (the message is also available at https://my.hostetski.com/billing.php?do=maillogs in your account):
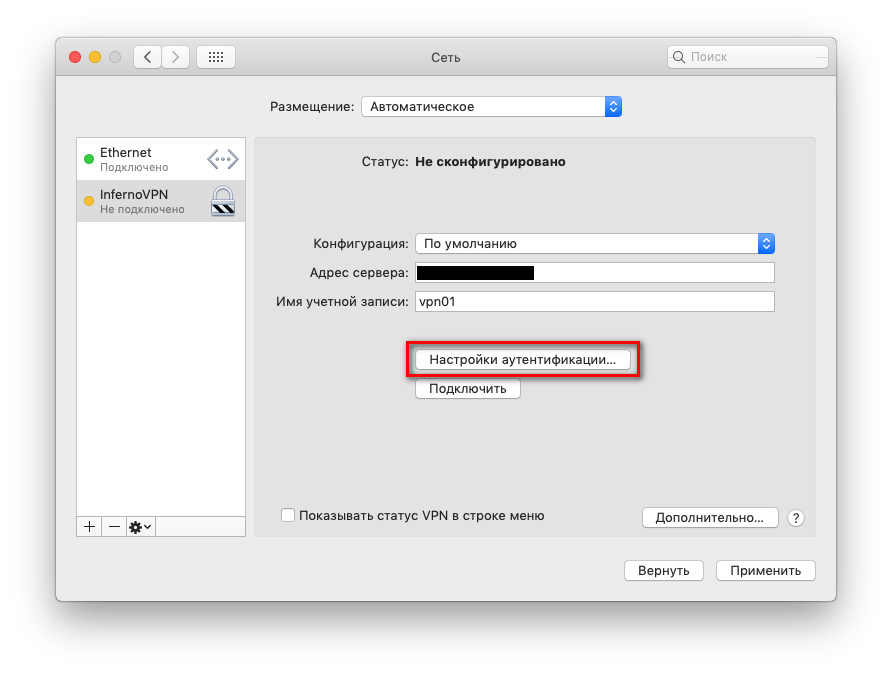
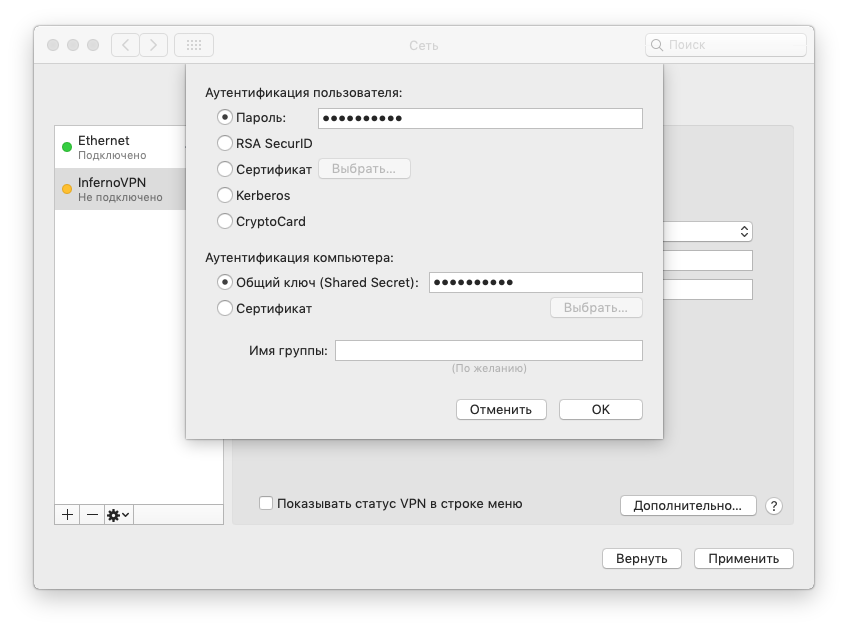
Click the "Authentication Settings" button:
Next, you need to enter the PPTP / L2TP password, as well as the "Shared Secret" - IPsec shared PSK:
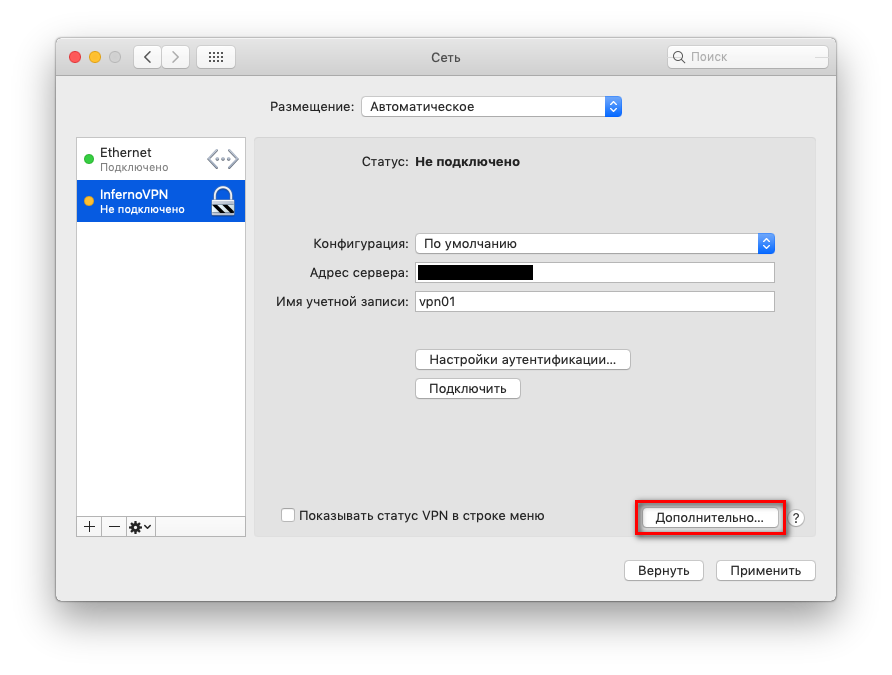
After that, click the "Advanced" button:
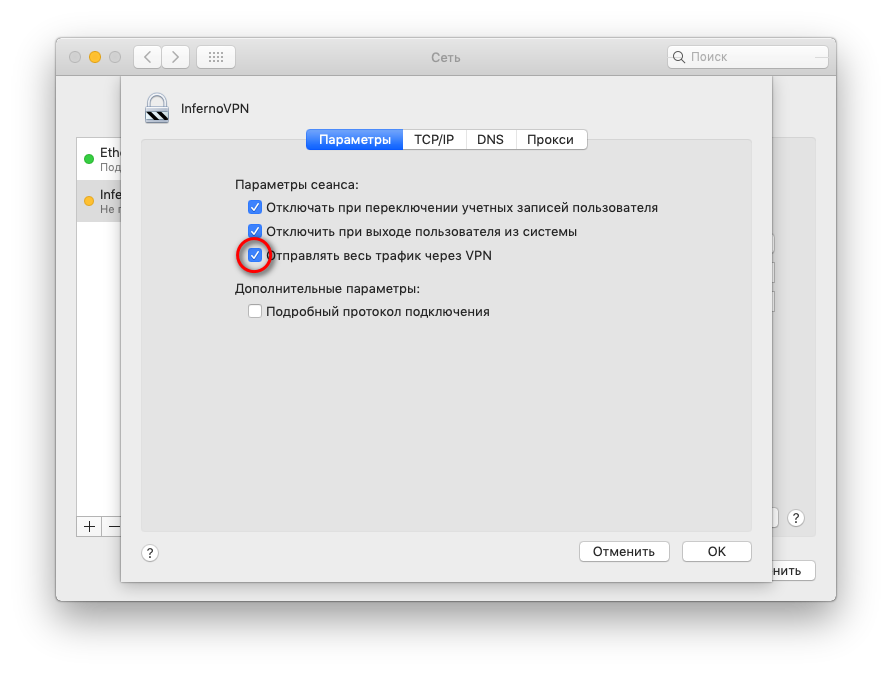
In the advanced settings window, in the "Options" section, check the "Send all traffic through VPN" checkbox and click "OK":
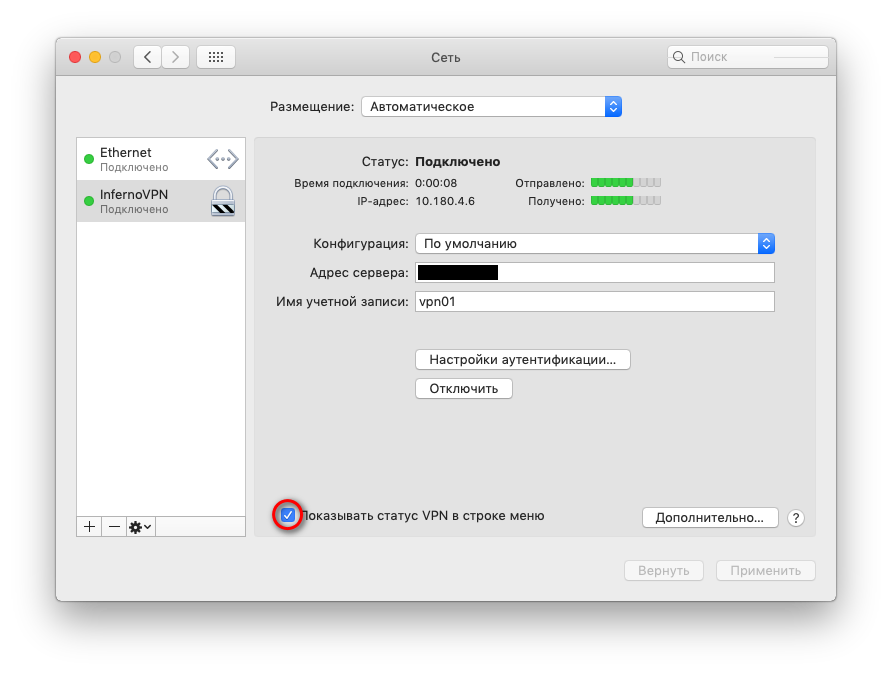
Save the settings made by clicking "Apply" and connect to the created VPN connection by clicking "Connect":

If the connection is successful, the status will change to "Connected," and you can track VPN usage statistics. You can also check the "Show VPN status in menu bar" checkbox to see the VPN server connection status in the macOS top menu:
If you have additional questions, you can use our ticket system.
We've been working for 4 years 8 months 27 days
